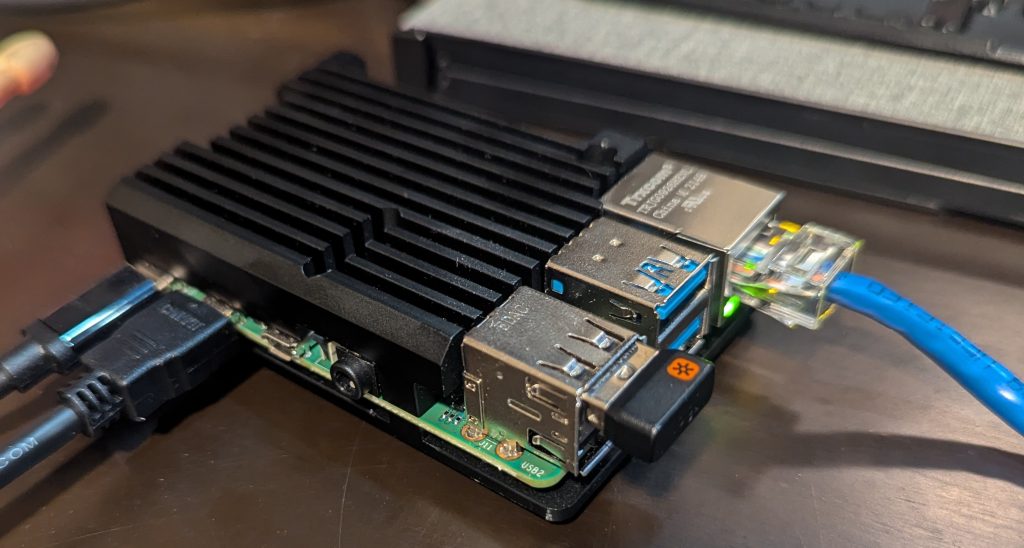
After moving my home server to fedora-bootc, and gitting a really nice git workflow in place, I remembered that I have this Raspberry Pi 4 sitting around collecting dust. This was a really nice system that I bought to run Octopi to manage my two Prusa Mini printers. Now that I’ve upgraded to the MK4, I don’t feel the need to use Octoprint any more. …but having a useful aarch container host on the network *is* appealing to me especially since I do a decent amount of container work on my M3 Mac using Podman Desktop. Fortunately, it’s pretty simple to get fedora-bootc working great on the Pi4. So grab your RPi, blow the dust off, and get ready to get some value out of it.
It all starts with the Containerfile
Below is just a simple example to get you started. I’ve pulled a couple snippets from this repository to help inject my SSH keys and create users. This Containerfile has a clever if/then statement will intentionally fail if the podman build command does not contain something like –build-arg “sshpubkey=$(cat ~/.ssh/mykey.pub)”. Feel free to adapt this for your setup. Some obvious recommendations are to include quadlet files, add rpms, or really anything else you want.
FROM quay.io/fedora/fedora-bootc:latest

RUN dnf -y install cockpit cockpit-ws cockpit-podman git vim-enhanced tree && dnf clean all && systemctl enable cockpit.socket

COPY etc etc

ARG sshpubkey

RUN if test -z "$sshpubkey"; then echo "must provide sshpubkey"; exit 1; fi; \
    useradd -G wheel core && \
    mkdir -m 0700 -p /home/core/.ssh && \
    echo $sshpubkey > /home/core/.ssh/authorized_keys && \
    chmod 0600 /home/core/.ssh/authorized_keys && \
    chown -R core: /home/core

RUN set -eu; mkdir -p /usr/ssh && \
    echo 'AuthorizedKeysFile /usr/ssh/%u.keys .ssh/authorized_keys .ssh/authorized_keys2' >> /etc/ssh/sshd_config.d/30-auth-system.conf && \
    echo ${sshpubkey} > /usr/ssh/root.keys && chmod 0600 /usr/ssh/root.keys
Podman Desktop makes life easy
I love CLIs as much as anyone, but I have to admit that I’m sucker for eye candy too! Podman Desktop is all the eye candy you could ever want for your containers and it makes some fairly complex operations really simple. It runs on any OS, but everything in this post was done using my Mac. If you attempt using the bootc plugin section on a Linux system, I think you’ll need to run a podman machine for it to work. YMMV. Anyway, on a Mac the installation is super easy and it will get a podman machine up and working in no time.
Once you have your Containerfile setup on Podman up and running, click on the Images button on the lefthand menu followed by Build. Here we’ll browse to the Containerfile and select a couple other options. LIKE INCLUDING YOUR PUBLIC SSH KEY IF YOU EVER WANT TO LOGIN. :)

Next we’ll use the bootc extension to create a raw image that we’ll eventually dd on to the RPI’s microSD card. Click the adorable seal button on the menu:

Then select the container we built earlier, raw image, desired file system, and ensure that Arm is highlighted. Once this is in place click build.
Let’s Flash that image
Now that we have our image, open the handy-dandy Raspberry Pi Imager utility. All we need to do is select your model, the raw file we just created (note: the utility doesn’t allow the selection of raw files, change the file type to “all files” to select it), and your microSD card (or other storage device). Click Next and watch the progress bar with the enthusiasm of a child waiting for St Nick to visit.

Fun with firmware!
If you thought we were ready to pop the microSD card if you RPi and boot, you’d be wrong. :) Arm systems often require some extra love to ensure the proper firmware, device tree blobs, etc are in place. Fortunately, our friends who make Fedora CoreOS have a really great write up to get the files necessary. Feel free to follow the steps as it, I tweaked it a bit to be able to fetch on a Mac using a super lame script. Save this file as fetch_efi.sh and chmod +x the file
#!/bin/bash
RELEASE=40

mkdir -p /tmp/efi/boot/efi
dnf install -y --downloadonly --release=$RELEASE --forcearch=aarch64 --destdir=/tmp/efi/ uboot-images-armv8 bcm283x-firmware bcm283x-overlays
for rpm in /tmp/efi/*rpm; do rpm2cpio $rpm | cpio -idv -D /tmp/efi/; done
mv /tmp/efi/usr/share/uboot/rpi_arm64/u-boot.bin /tmp/efi/boot/efi/rpi-u-boot.bin
Once you have that script ready to go, simply make a directory called tmp in your working directory place the script in it. Next, we’ll run this to grab the files:
podman run -ti --rm -v $(pwd)/tmp:/tmp fedora-bootc /tmp/fetch_efi.shLet that run and the files we need will be under $(pwd)/tmp/efi/boot/efi Open that directory in finder along with the microSD boot partition. I found that I needed to reinsert my microSD card as the RPI image utility will eject it after flashing it. It shows up as a “NO NAME” drive on my system. Simply drag the files over to the microSD card’s root directory and eject it when the copy is finished.
…and yes, I’m fully aware that if you’re reading this blog you just lost all respect for me that I didn’t copy these files on the command line. Well, I did that on my Universal Blue system earlier, but I didn’t want to burn the calories to figure out where disks mount on a Mac – remember I’m a Linux guy. Maybe next time!

It’s go time!
Toss the microSD into your RPi and power it on. If you gave your container image a proper [registry]/[user]/[image]:[tag] format earlier in Podman Desktop, it will automatically update when you build and push your next image. That feature alone is worth the price of admission IMO and opens the door for all type of slick automation. Don’t worry if you missed this, simply push your next container build to the registry and run bootc switch [registry]/[user]/[image]:[tag] and you’re good to go!
Getting this up and running was really easy, and while the firmware section might seem like a drag, keep in mind you only need to do that once. Future updates won’t blow away your firmware. In fact, it probably wouldn’t be too difficult to adapt that script to run as a quadlet on boot that would update the firmware bits in place. That could easily be included in the bootc image, but that’s something to tackle for another day!
My next steps are to add this as a runner to my Gitea server for doing automation jobs. That’s way cooler than collecting dust!!
Update #1: I left out partition/filesystem resizing. As we don’t really know the size of your microSD (why not get a 64G to 128? They’re crazy cheap!) card, bootc-image-builder will assume a simple 10G size. Two commands will resize the main partition and file systems:
#Resizing the partition can happen on the RPi when it's booted & running:
sudo growpart /dev/mmcblk0 3
#Resizing the root filesystem live isn't supported. I slapped the card in my Universal Blue laptop and used the output of sudo dmesg to make sure I had the right device:
sudo resize2fs /dev/sdc3
Now, you can use the full storage of the card, easy peasy. Please leave a comment if I screwed up anything else. Thanks!
Update #2: Connect to wifi using: sudo nmcli device wifi connect [SSID] –ask
I use nmcli once every 3 years so I always have to reference the docs. This setting will persist across reboots/upgrades like you’d want. It works great.
Thank you for your recent write ups on personal bootc projects. Time to dust off a spare rPi.
Thanks for checking it out. So far I’ve been unsuccessful at making this work on the pi5, but it’s super easy on the 4. I’m also putting together a new desktop and plan to use a bootc image for everything. All driven by git and 100% automated. Hopefully I’ll have a new blog on that in a couple weeks. Cheers!