
My last post walked through my migration to using fedora-bootc on my home server/NAS. In this follow up, I’m going to show you how I’ve automated the OS upgrades. I should note that while I’m a huge fan and believer in Git-Ops conceptually, I’m a noob at using the technology. Please leave a comment or ping me if you see improvements that can be made. I suspect there are many! Anyway, let’s dive in.
Step 1: Git ready!
I decided to use Gitea for my environment. I honestly have no opinion about the various options available. I basically used this one because I’ve seen some co-workers use it and I knew it was easy to install. It’s also mostly compatible with Github, so much of what you see here should just work if you prefer Github. I’m also going to do everything with podman and buildah. I don’t have anything against Docker, but I’m more familiar with these tools now and given they’re the defaults in Fedora, it just makes things easy.
Deploying Gitea is as easy as this using Podman’s quadlets. Run this on a system you want to be your Gitea server:
/etc/containers/systemd/gitea.container
[Unit]
Description=gitea
After=network-online.target

[Container]
Image=docker.io/gitea/gitea
ContainerName=gitea
AutoUpdate=registry
PublishPort=3000:3000
PublishPort=2222:22
Volume=gitea-data:/data:Z
Volume=gitea-config:/etc/gitea:Z

[Service]
Restart=always

[Install]
WantedBy=multi-user.target
Once those files are in place, a quick systemctl daemon-reload && systemctl start gitea, you’re good to go. Visit the landing page and answer a couple questions and create you repo!
Step 2: Set up Actions & a Runner
First, a huge thanks to the author of this post and for his repo that helped me get this working. THANK YOU!. Let’s pick a system to do the container builds. It can be the same host that’s running gitea, but I have a couple others handy so I used a different system. Regardless, here’s what I did.
On the system you want to be the runner, enable dns for the network being used. podman network update podman --dns-add 8.8.8.8 #or pick an internal DNS server. My system wasn’t able to resolve hostnames, and therefore, couldn’t clone the git repo w/o this. I also manually registered the runner before running the container. I don’t think this is required, but I’m listing it here just in case: ./act_runner-0.2.10-linux-amd64 register --no-interactive --instance https://[gitea] --token [token] The binary here is linked in the Gitea Actions Quickstart. From here, use the following quadlet file to get the runner going for real:
/etc/containers/systemd/act_runner.container
[Container]
Image=docker.io/gitea/act_runner:nightly
ContainerName=act_runner
AddDevice=/dev/fuse
Environment=GITEA_INSTANCE_URL=[gitea_url]
Environment=CONFIG_FILE=/config.yaml
Environment=GITEA_RUNNER_REGISTRATION_TOKEN=[token]
SeccompProfile=unconfined
SecurityLabelDisable=true
Volume=/etc/config.yaml:/config.yaml
Volume=/var/run/podman/podman.sock:/var/run/docker.sock

[Install]
WantedBy=multi-user.target default.target
/etc/config.yaml
runner:
  labels:    - runner:docker://[internal_registry]/gitea-buildah:latest    - podman:docker://quay.io/podman/stable:latest

container:
  force_pull: true
  options: --security-opt label=disable --security-opt seccomp=unconfined --device /dev/fuse:rw
  network: podman
As artur-borys points out, we’ll need a couple packages added to the podman/buildah containers. Rather than use his containerfiles, I wanted to try just layering these required packages onto the image maintained by upstream and it works like a champ:
I just named this image gitea-buildah, but you can call yours whatever you want as long as you point to it in the /etc/config.yaml file above. Build it and make it available to your systems via a registry:
Containerfile
FROM docker://quay.io/buildah/stable:latest
RUN dnf -y install nodejs git podman curl wget && dnf clean all
You know the drill, systemctl daemon-reload && systemctl start act_runner Confirm that your runner is up and running in Gitea under Site Administration → Actions → Runners
Step 3: Fun with Workflows
Here’s where the magic starts to come together. Go ahead and create a new repository for your bootc Containerfile and configs. The example below will run a build & push of your bootc image with each git push it will also run weekly, think of this as just picking up the patches. Note the provided examples, used variables for the image name that were failing for me. Since this is relatively straight forward I just hard coded my registry & image name under the tag: section. If you’re using this be sure to either hard code yours or replace with proper variables. Once that file is ready to rock, we will commit it in the same repo as your bootc container image under .gitea/workflows/rebuild.yaml (or name it anything you like)
name: bootc build
run-name: ${{ gitea.actor }} is running Gitea Actions 🚀
on:
schedule:
- cron: "0 0 * * 5"
#- cron: '@hourly'
push:
branches:
- 'main'
jobs:
# This workflow contains a single job called "build"
build:
strategy:
matrix:
flavor: [podman]
runs-on: runner
steps:
# Checks-out your repository under $GITHUB_WORKSPACE, so your job can access it
- uses: actions/checkout@v3
- name: Build bootc image
id: build-image
uses: redhat-actions/buildah-build@v2
with:
tags: [registry]/[image]:latest [registry]/[image]:${{ github.sha }}
containerfiles: |
./Containerfile
- name: Push To registry
id: push-to-quay
uses: redhat-actions/push-to-registry@v2
with:
tags: tags: [registry]/[image]:latest [registry]/[image]:${{ github.sha }}
registry: [registry]
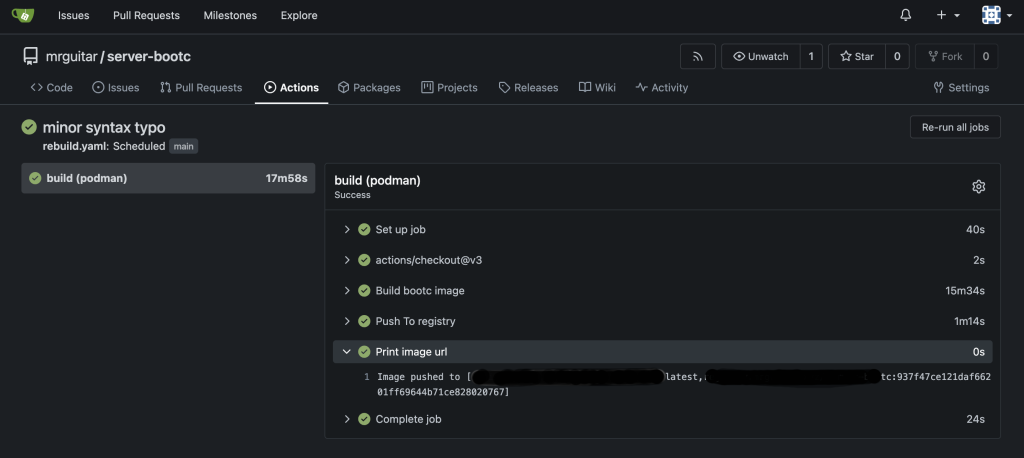
- name: Print image url
run: echo "Image pushed to ${{ steps.push-to-quay.outputs.registry-paths }}"
Step 4: Complete the Ouroboros
At this point, your OS images will be built on a regular cadence and pushed to your registry. The default fedora-bootc image will check for updates every ~8h. Since I’m doing weekly rebuilds, I want to have my system check for updates weekly. This config file can be placed “inside” your bootc image, and commit it to your git repo like any other change to your image. If your actions are setup properly, committing this change will automatically create your OS update, and your system will automatically install it when the timer runs next. You can view systemd timers by running systemctl list-timers – that’s one of the most underrated commands in systemd!
etc/systemd/system/bootc-fetch-apply-updates.timer.d/weekly.conf

[Timer]
OnBootSec=1h
# Let's clear the default here
OnUnitInactiveSec=
# This is my favorite setting when deploying large amount of systems, but since we only have one let's clear it so the timer fires exactly on time.
RandomizedDelaySec=
#Apply updates on Saturday at midnight
OnCalendar=Sat *-*-* 00:00:00
Let’s Wrap Up and Review:
- Put your bootc image Containerfile & configs in a git repo. (preferably one that supports actions or another alternative)
- Create a workflow to rebuild your bootc image on a git push AND on a time-based schedule.
- Tweak the bootc-fetch-apply-updates timer to suite your needs.
I’ve only had this working for a couple of days. I expect to make a lot of improvements as I go, and also hope this helps others discover the potential of using Git-Ops for management of their Linux systems. I realize it’s not very impressive to have this running for a single system, but this model can easily scale and blast out OS updates & configs to A LOT of systems. I’m loving how powerful this is. Enjoy!
2 Replies to “Automating bootc deployments using git”