
Raised garden beds are fantastic because they drain well, are relatively easy to build, and are capable of producing an impressive yield of food. Amanda and I have built a couple of these based on the Pioneer Woman’s blog post on this subject. These worked really well for us, but we wanted to step up our garden and needed to solve two problems: 1) more space 2) protect against rabbits and our crazy dog. Other geographies will need different adaptations to protect against different pesky critters, for example burrowing animals. The design shown here should lend itself fairly well to various types of adaptations. If you come up with something neat please share it with us!
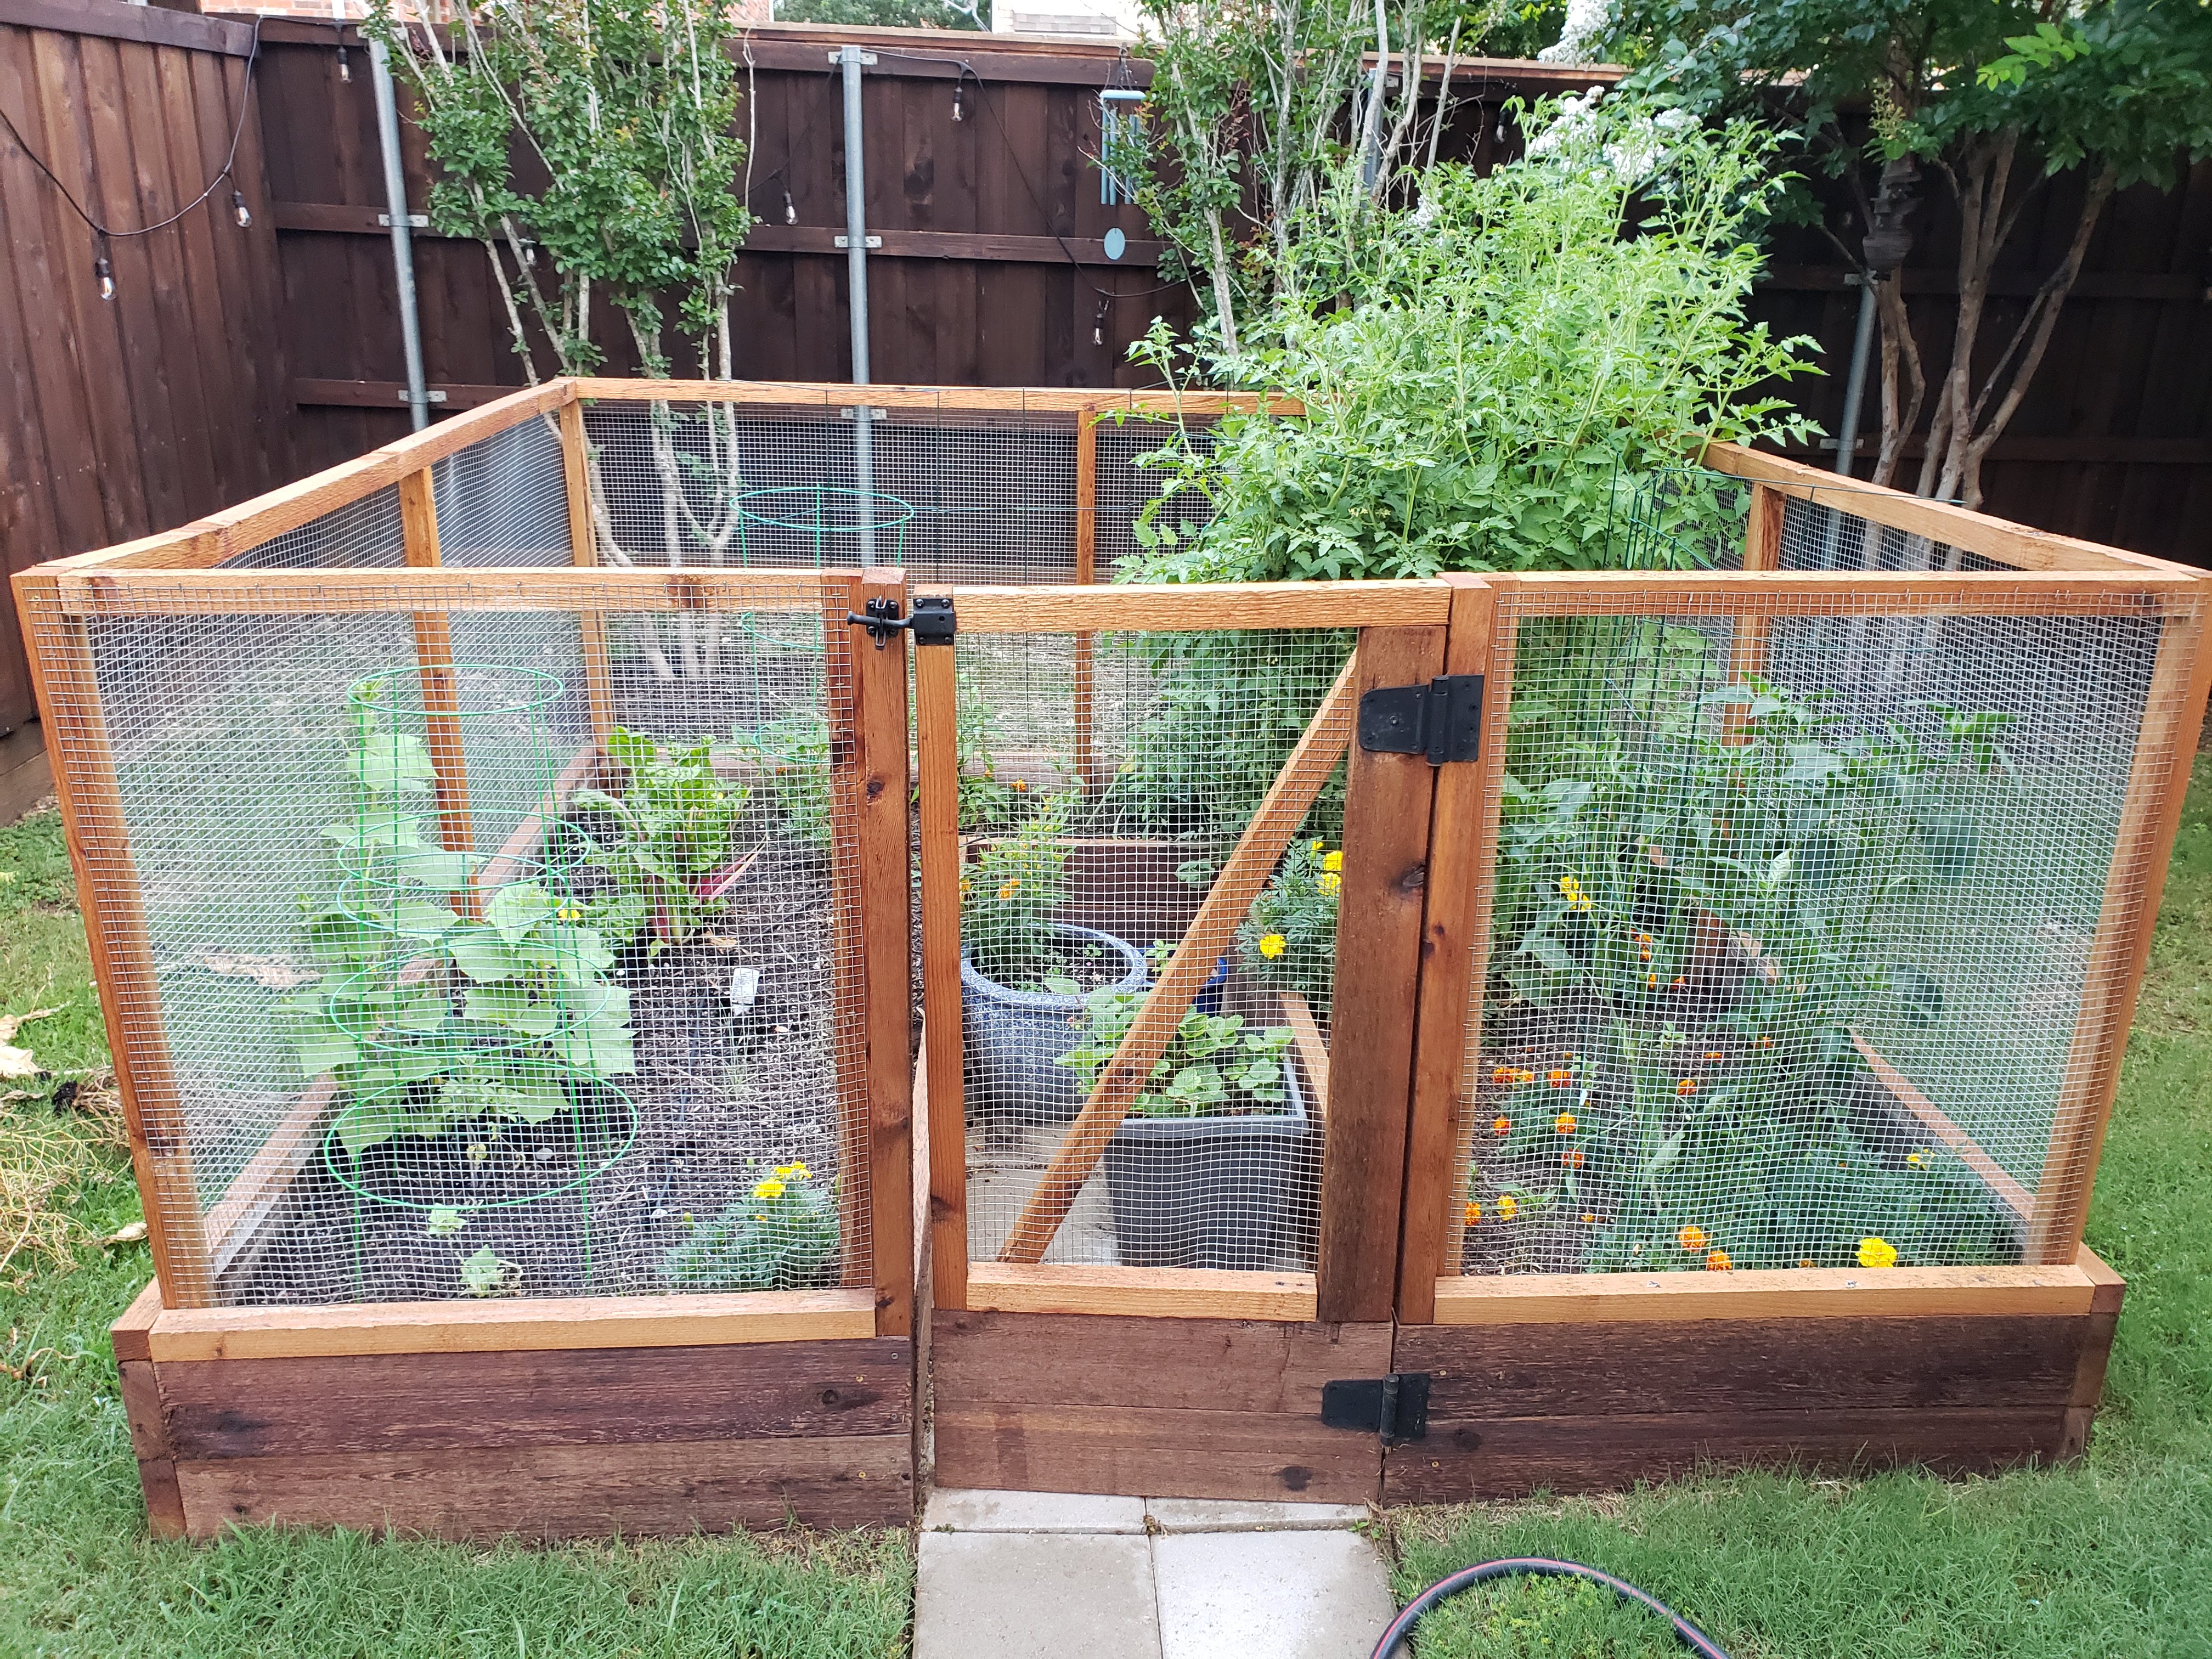
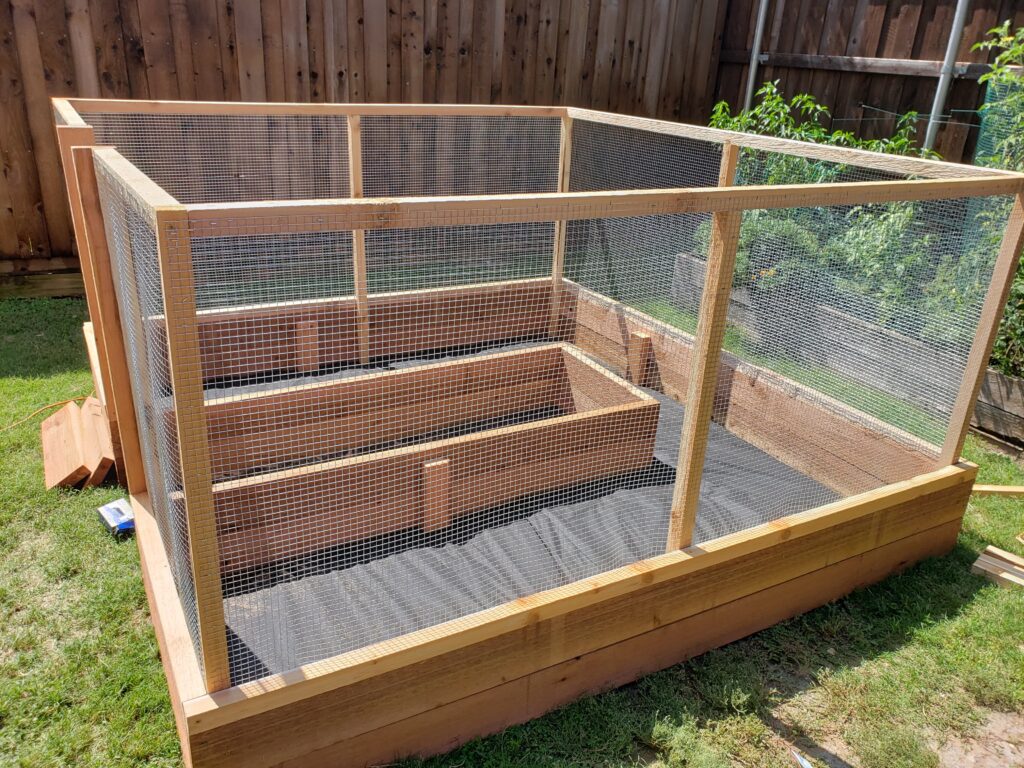
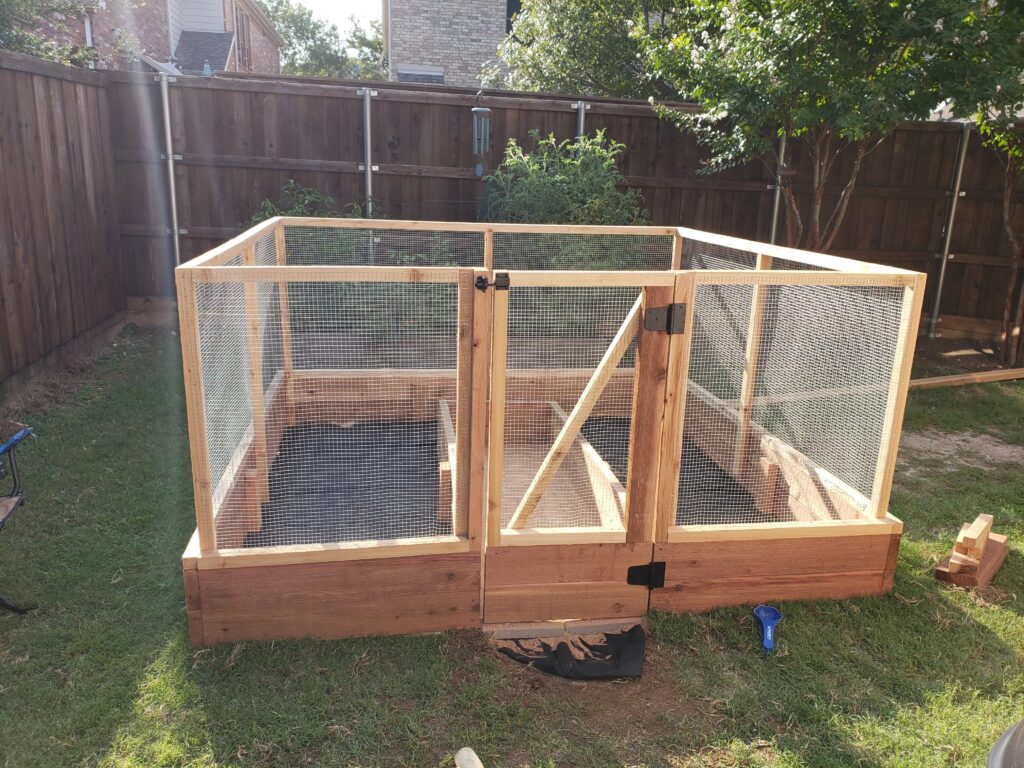
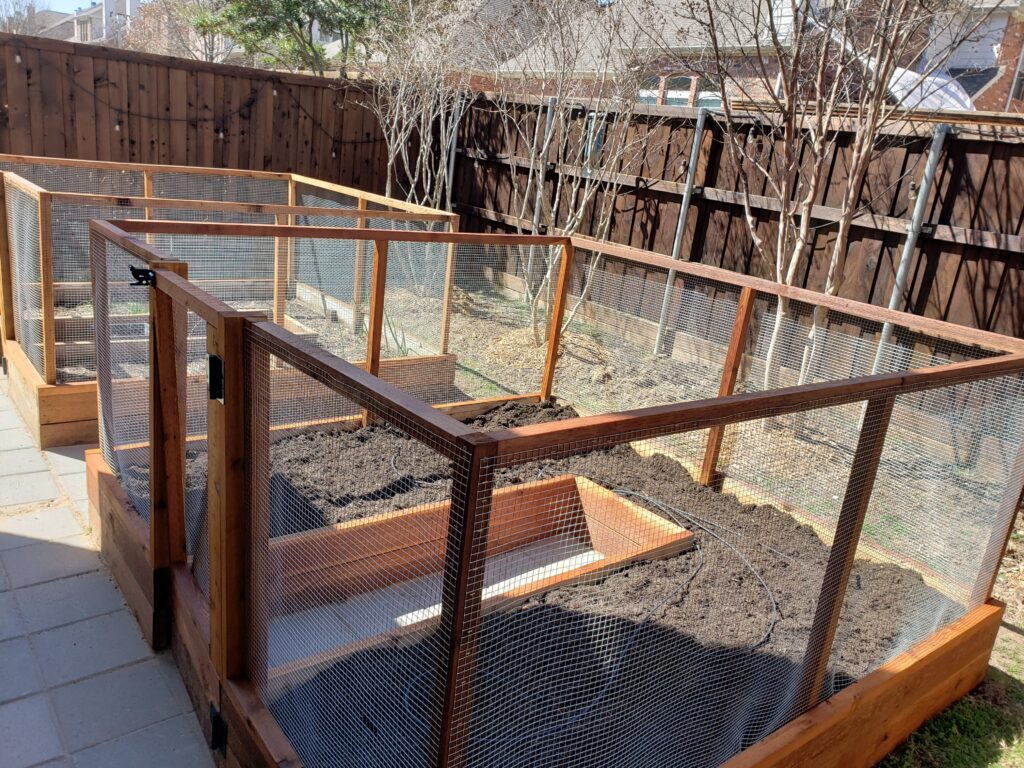
Essentially we turned the basic rectangle into a U-shaped bed with a fence on top of the outer perimeter with a simple gate on the front. This solves both our problems, and worked so well that we just built a second one. Accessing the plants from the inside is a bit more restrictive, but to us the benefits far outweigh the cons. It’s also worth noting that this design doesn’t protect against rats or squirrels or any other animal capable of climbing. We weren’t bothered by that because the fence makes it really easy to use traps for these pests while also keeping our pets and children away from traps. It’s a win win.
Tools needed
- A friend! This is a two person job.
- Drill w/ phillips head and an appropriately sized drill bit for pilot holes
- Saw – any type is fine. We just used a cheap hand saw for all the cuts.
- Staple gun w/ lots of staples.
- Tape measure
- pencil for marking cuts
- Wire cutters
- Carpenter square
- Probably more!
Supplies Needed
- Qty 12 – 2x6x8 boards (we used cedar for everything so these will last longer in the elements)
- Qty 2 – 2x4x8
- Qty 10 – 2x2x8 – you may need more of fewer of these depending on the height of fencing you choose to buy.
- 1/2 in. x 3 ft. x 25 ft. 19-Gauge Hardware Cloth (the exact fence type and height can vary. We were happy with this type, but really there are a bunch of good options. Just adjust your wood quantities as needed *we used more 2x2x8 to add a layer around the base to conceal the bottom of the hardwarecloth*)
- 1/2 in. x 3 ft. x 5 ft. 19-Gauge Hardware Cloth – Since 25 feet isn’t quite enough, we just need a little bit more
- 1x box of 3 1/2″ #2 exterior screws – use the longer screws for corner joints, and others where there’s no risk of them poking through the wood.
- 1x box of 2 1/2″ #2 exterior screws – use the shorter screws where the longer ones will drill through the wood.
- Self-closing gate kit
- Weed barrier cloth (there are many types of this, get whatever works)
- A deceptively large amount of dirt & compost
The first step is to find the desired location and ensure it’s level. It doesn’t have to be perfect, but definitely use a shovel or hoe to take out any large bumps.
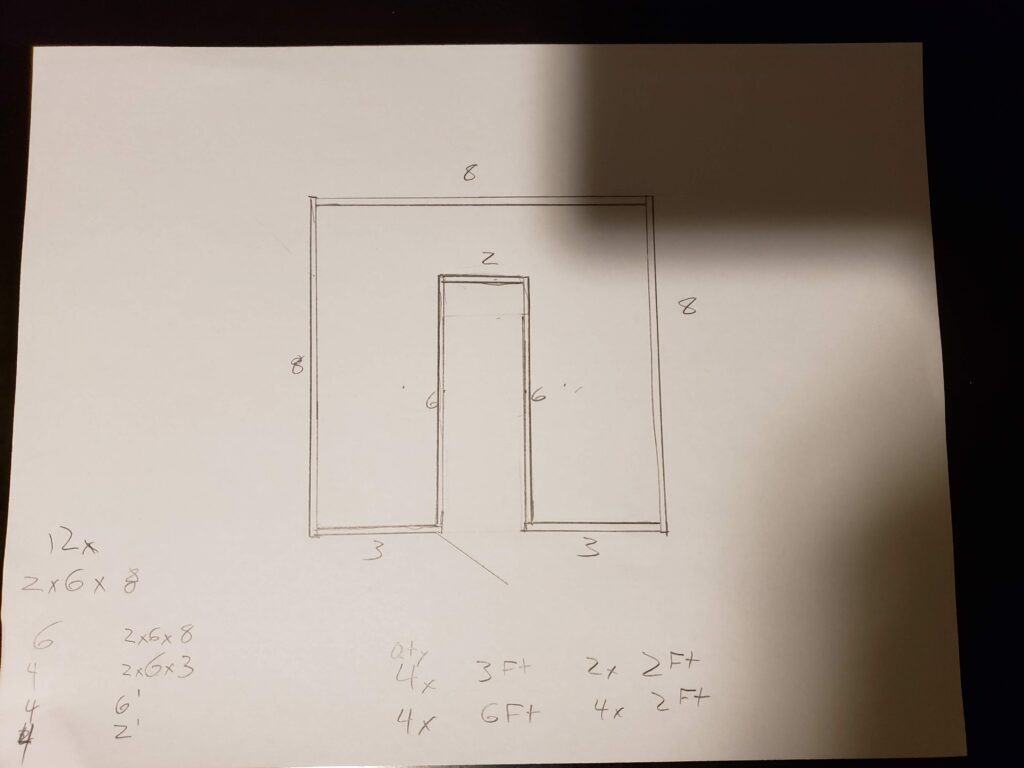
Measure and make the following cuts on the 2x6x8 boards
- Qty 4 – 6 foot cuts (keep the 2 foot pieces)
- Qty 4 – 3 foot cuts (keep the 2 foot remaining pieces and use these for the door)
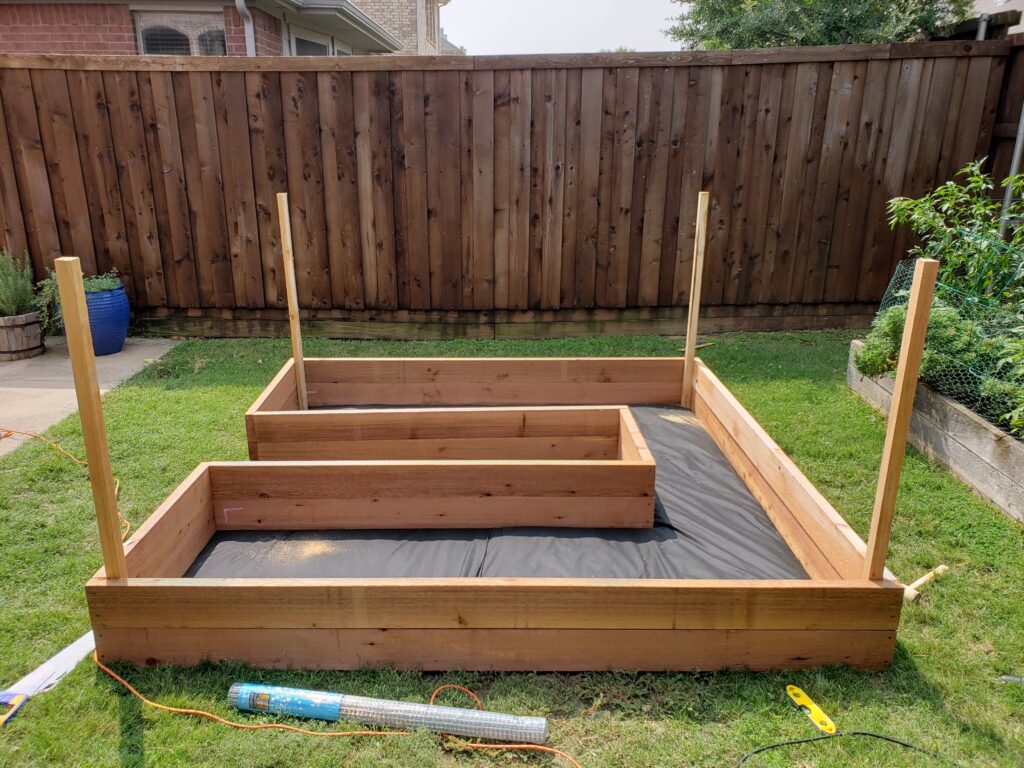
Now that we have the foundation cut, layout the base and pay close attention for how the boards are attached. It matters how the ends are attached. The drawing above correctly illustrates this. When screwing the boards together, it really helps to have your friend hold the boards in place. This will ensure a much better looking build. Use two screws to attach each board, always drill pilot holes, and use a carpenters square to align the angles.
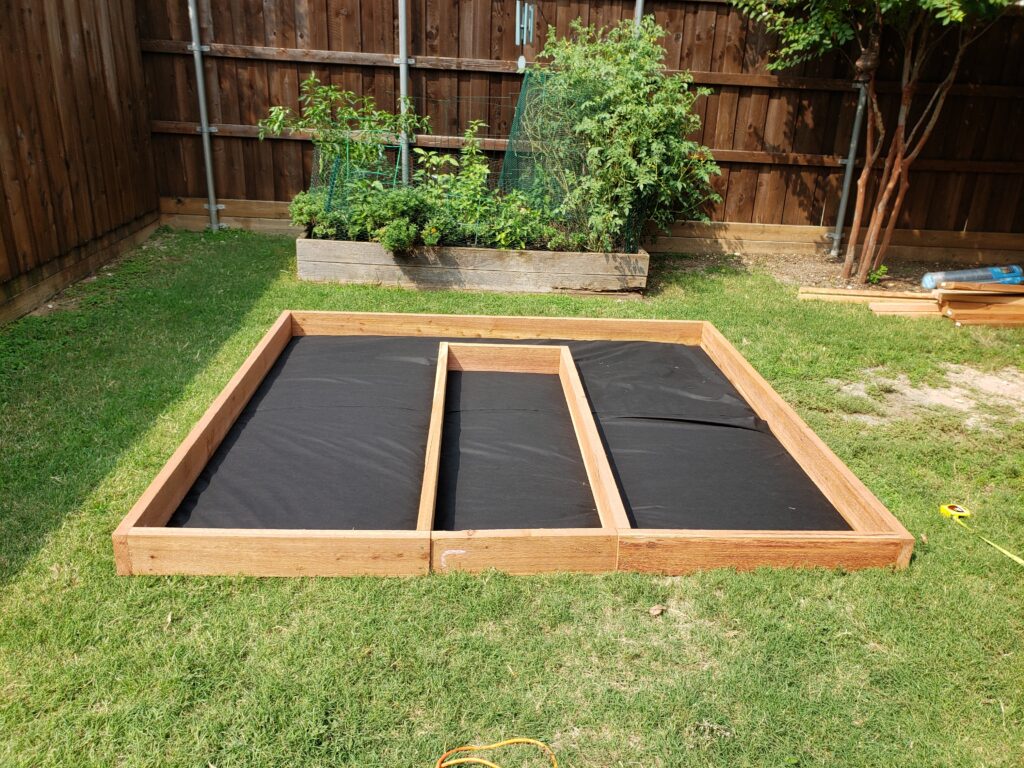
After the first level is complete, build the same thing on top.
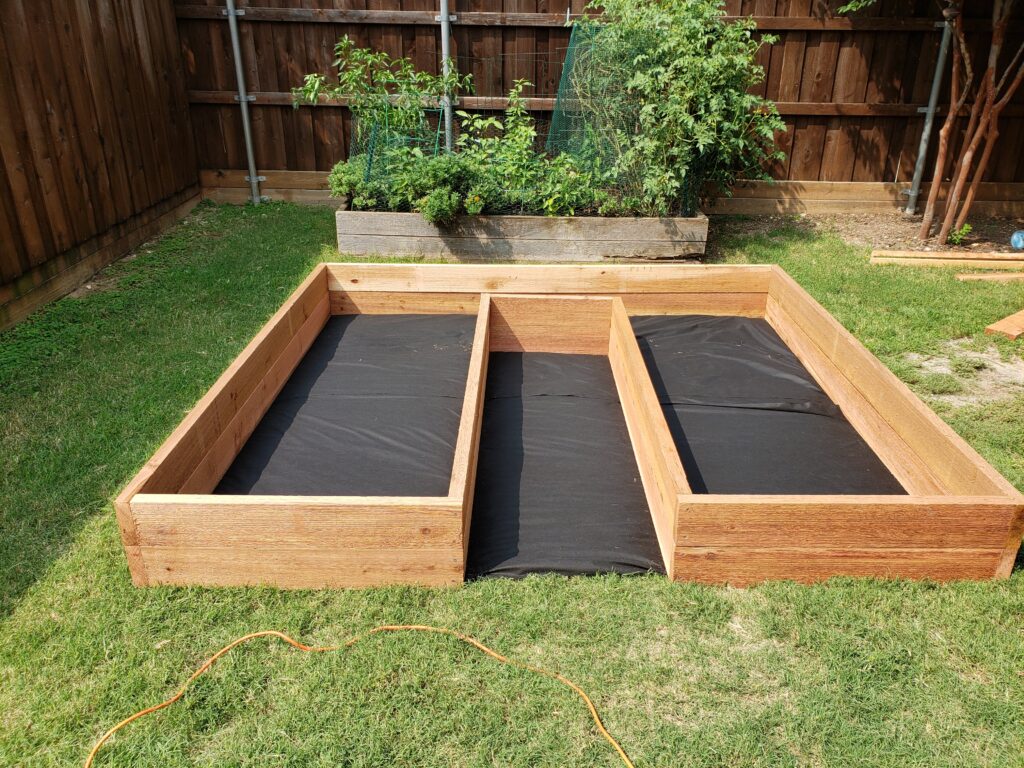
Once the two layers are complete we’ll attach them using one of the 2x4x8 boards. Make cuts 10 inches apart. We’ll use a Qty of 5 pieces to attach the along the middle and one in the back. Make sure that one screw goes into the top board and the other goes into the bottom board.
Cutting the posts for the wire fencing can be tricky. We found an effective way to measure is to set an uncut 2x2x8 board firmly in the desired corner and place the bundle of fencing on the foundation with a 2×2 laying horizontally on top. Use that height as the point to mark the post for the cut. We want the height to be the fencing length plus 2″….but the 2x2s we’re using are not exactly 2 inches so we just placed one on top of the fencing to use as a marker. After marking and cutting each one, place it in the corresponding corner and attach it with two screws from the inside.
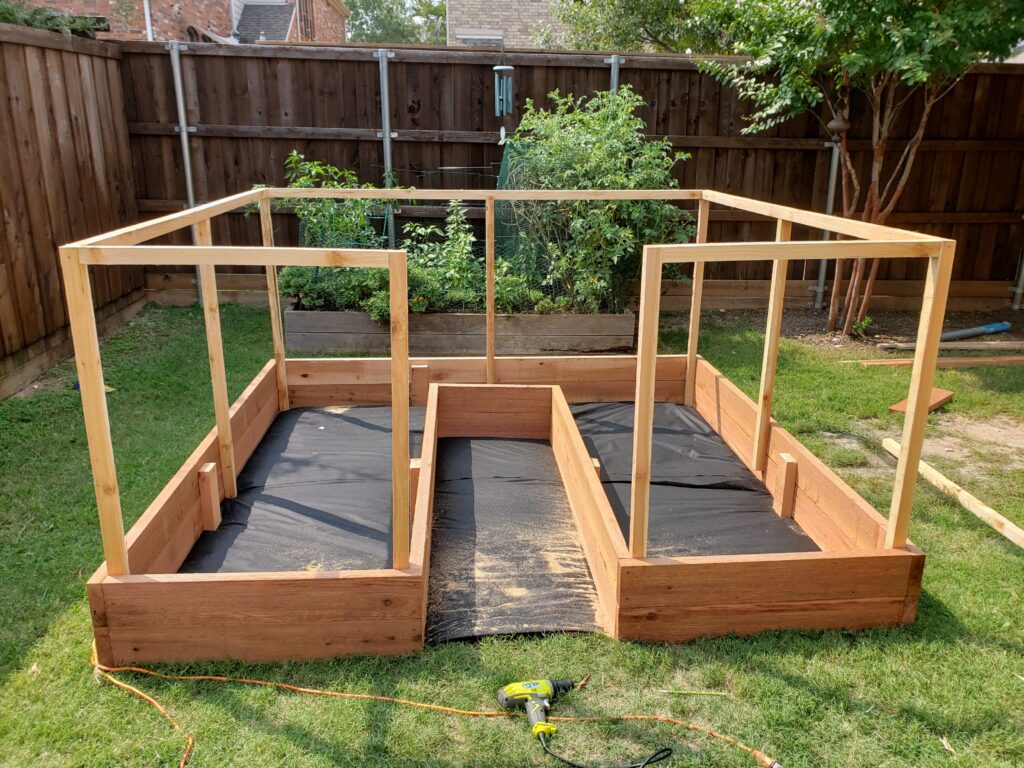
Next attach the three 2x2x8 beams across the top. Use the posts to measure the length, as these will need to be shortened slightly with the saw. Also the four corners will have two screws going through them. Ensure that one is higher and the next direction is lower so they don’t collide. Don’t aim for the middle here! After the top boards are in place, use three more 2x2x8 as mid-way supports. These three vertical supports are really important for attaching the fencing.
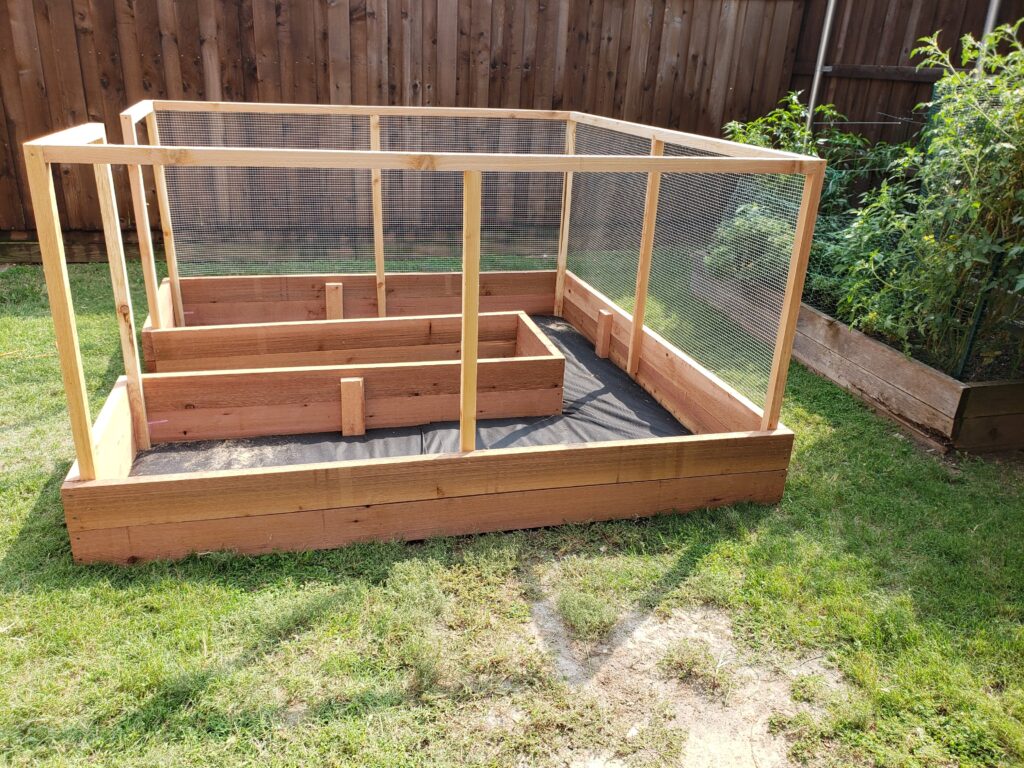
Now we’re ready to attach the fencing. This stuff can be difficult to work with. We recommend unrolling it on a cement patio or driveway. The metal will want to recoil making this whole process annoying. “Rolling” the fencing in the opposite direction it was packaged will help it break that tendency. Also “rolling” the fencing diagonally will help a lot too. Carefully measure the mid-point of the corner posts for each section of fencing. Use wire cutters to cut a matching length of fencing. This is time consuming unfortunately. Then with the piece cut, use a staple gun to attach it . One person will need to hold the fencing in place while the other staples it. Start with one corner at the top, and slowly work your way across the top until you reach the other side. Then work your way down the supports. It’s really difficult to make this look perfect. Just do your best as the fencing is challenging to work with. Repeat for each section.
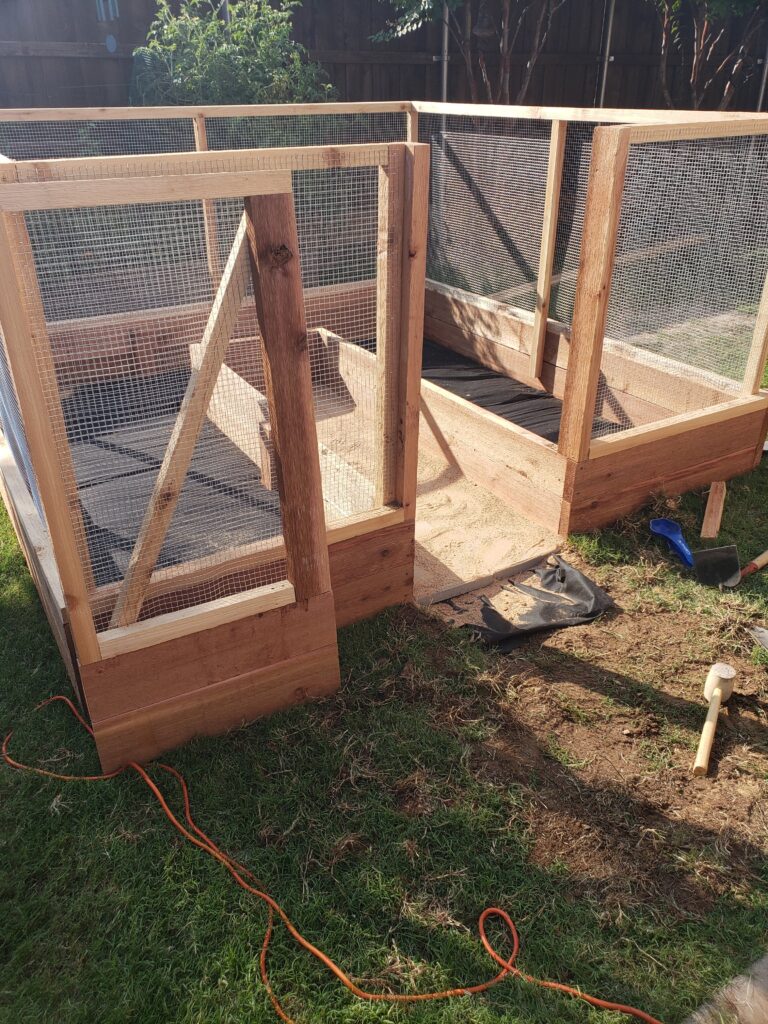
Next we will add two 2x4s to reinforce the front posts. These are the boards we’ll attach the gate to. Next add an additional ring of 2x2s along the top of the foundation, screw in from the top. This give us a base to staple the bottom of the fencing to from inside the garden. Attach the fencing with lots of staples. It will likely bunch in some places; just do your best.
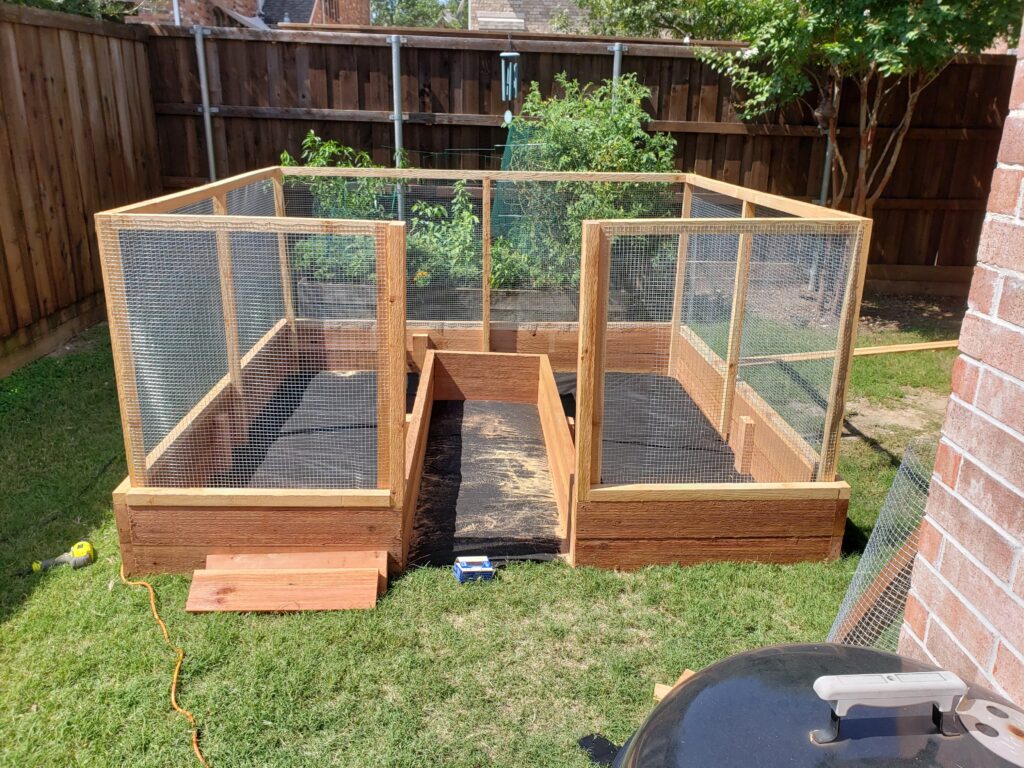
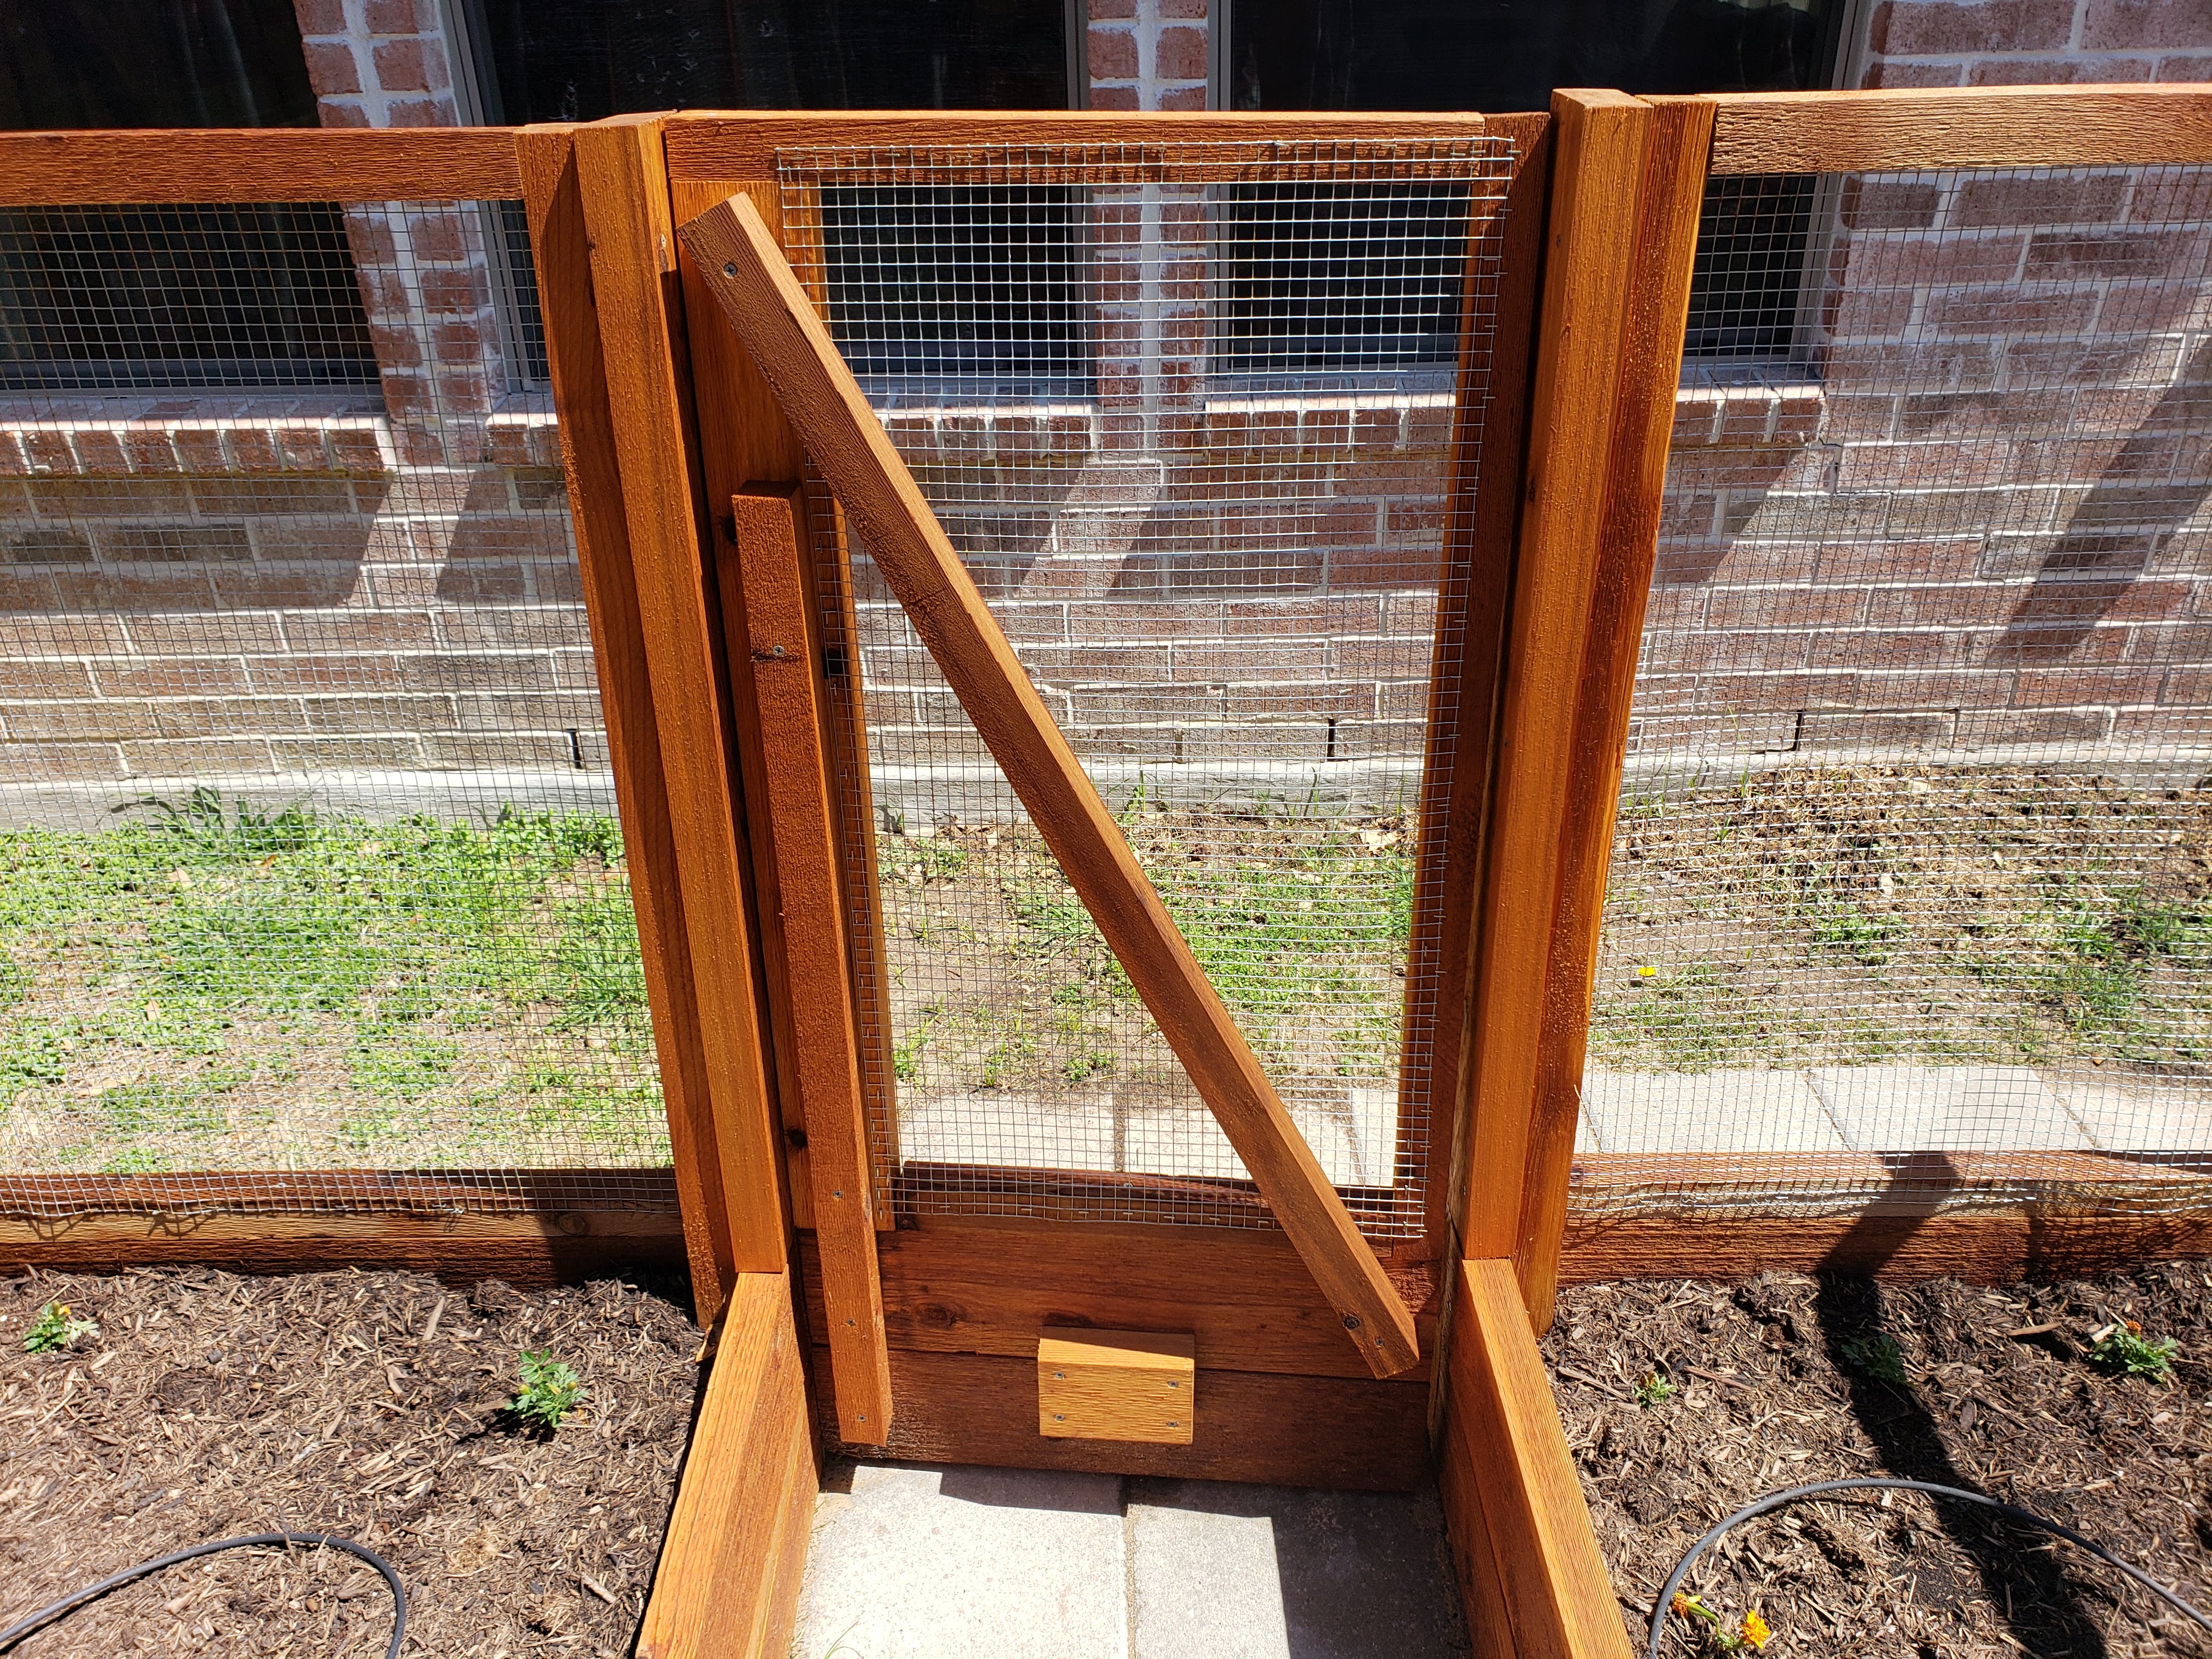
Next we’ll need to build a door. Use the 2x6x2 boards from the beginning as the foundation, and use a combination of 2x2s & 2x4s to make it match the rest of the garden. After attaching the fencing, I used the last of our 2x2s for a diagonal support. Once the door is built, use the hinge kit to attach it.
For Extra Credit
At this point you can add dirt and be finished. For those who want some extra credit, now is a great time to apply a varnish (or some kind of protecting finish to prolong the life of the wood). Be sure to use one that won’t poison your food. We used this stuff and it seems to work well. We were careful to not paint it on the inside of the base boards.
The real trick to getting better garden yields is automating the irrigation setup. Our builder-grade sprinkler system was horrible to program. Once some of the modules failed, there was no excuse not to upgrade it. I’ve been using the OpenSprinkler system for almost 2 years and I love it. This gives me a web interface & api on my local network with no annoying cloud subscriptions to worry about. They also have an android app that’s very convenient to use. Each of our garden beds were built on top of a sprinkler head. We had this converted to a 6-way tubing adapter and have 6 micro sprayers attached. Yes, there are more water efficient systems to use, but this is working really well for us.

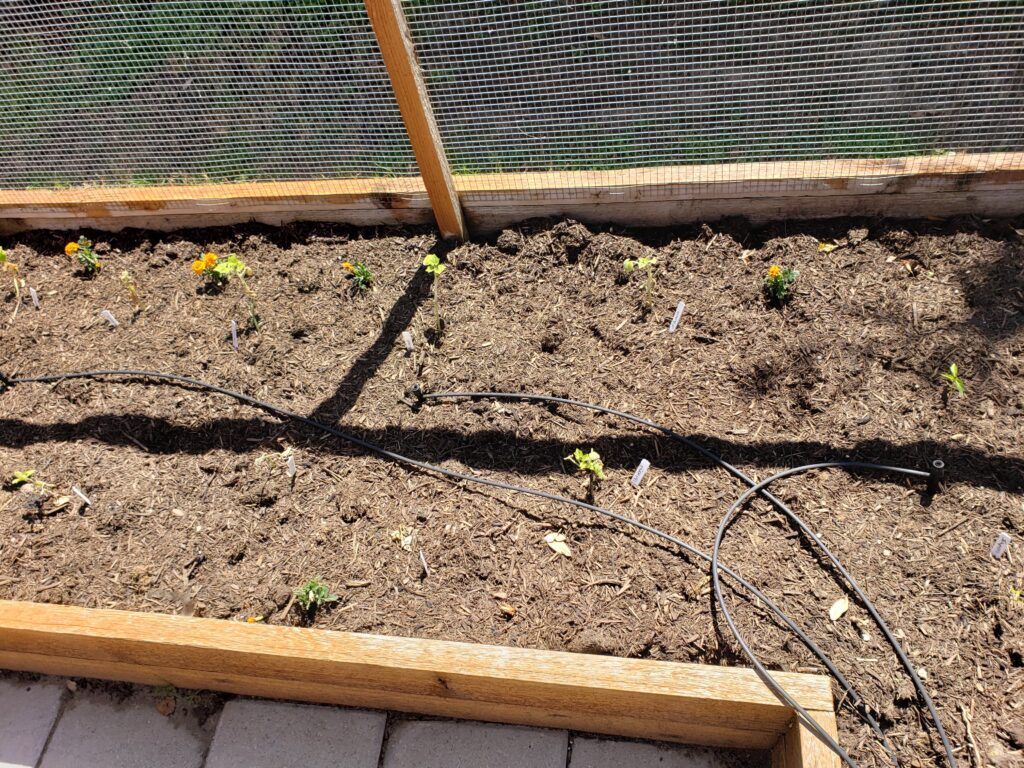
The cement blocks we used to fill the path in the garden are 1 sq. ft and very cost effective compared to other stone options . We decided to dig out the dirt so the stones would be flush with the ground and not impede the gate. You could skip that step and simply adjust the height of the gate as an alternative.
The only real downside with this setup is the cost. The one we built in September of 2020 was approximately $600. The second one we built in March of 2022 was $1,500. The rise in price of lumber was most of what caused the price to jump this high. Hopefully the materials cost will go back down, but this is the situation as of the time of writing this.
Anyway, we hope this was helpful, and please let us know if you end up making something similar. Cheers!
One Reply to “Rabbit-proof Raised Garden Bed”