WooHoo! RHEL 10 is here and it’s time to get moving with an image mode setup for Red Hat Summit!
Last week a buddy at work got a new laptop and wanted to install RHEL 10 using image mode. I thought to myself, “that’s great idea, why haven’t I already done this?” I really like using Fedora and getting exposed to the latest and greatest open source tech, but I also really value the stability and curation that happens with RHEL. Since virtually all of the applications I use are on flatpak, and any “fedora-ish” things I need are available via containers, why not have a bullet-proof OS using image mode?!
Twice a year, I eagerly await the new Fedora release and typically move to it on my systems during the beta phase. I was particularly excited about trying this with F42 because my setup *should* let me change the tag on my image to from :41 to :42 and then all of my “child images” should get automatically rebuilt, and then all upgraded. I’ve been a user of various rpm-ostree distros for many years now. I typically tell people that once you go through a major upgrade, that’s it – you’ll never go back. As you might imagine this post probably wouldn’t exist if everything was smooth sailing. Don’t get me wrong everything worked out fine, but I thought it might be helpful to others if I documented a few things about my experience.
I’ve been loving my new desktop setup for about ~four months now. I also think it’s pretty nifty that this system has only booted anaconda and containers! The integrated graphics were pretty impressive, but the simple, occasional CAD work I do quickly exposed the weakness in this area. I also want a setup that can offload some AI models to the GPU. I had heard that it’s painful to buy a GPU right now – that’s an understatement. As I write this, NVIDIA is in the middle of releasing the 50xx series and scalpers are working hard to buy them all. Anyway, I settled on a cheaper one from Amazon, until the stars align for me to get something like the 5090.
Th 4070 is pretty awesome for any graphics needs I have, but really isn’t enough memory to be useful for AI
If you’ve ever used Linux with a “team green” GPU, you’ve no doubt run into the fun world of drivers on Linux. We’ve known that using image mode & bootc would be a powerful tool for managing dependencies like this, but this is the first time I had the opportunity to get hands-on. This post will walk through some of the possible scenarios for handling GPU drivers on Fedora, CentOS Stream, & RHEL when building bootc images.
bootc is ridiculously amazing for headless servers – everyone knows that! It’s also a great fit for appliance-style graphical kiosks. What about a daily driver like a desktop or laptop? The TL;DR is it’s amazing, and I thought I’d share my experience.
After moving my home server to fedora-bootc, and gitting a really nice git workflow in place, I remembered that I have this Raspberry Pi 4 sitting around collecting dust. This was a really nice system that I bought to run Octopi to manage my two Prusa Mini printers. Now that I’ve upgraded to the MK4, I don’t feel the need to use Octoprint any more. …but having a useful aarch container host on the network *is* appealing to me especially since I do a decent amount of container work on my M3 Mac using Podman Desktop. Fortunately, it’s pretty simple to get fedora-bootc working great on the Pi4. So grab your RPi, blow the dust off, and get ready to get some value out of it.
My last post walked through my migration to using fedora-bootc on my home server/NAS. In this follow up, I’m going to show you how I’ve automated the OS upgrades. I should note that while I’m a huge fan and believer in Git-Ops conceptually, I’m a noob at using the technology. Please leave a comment or ping me if you see improvements that can be made. I suspect there are many! Anyway, let’s dive in.
Earlier this year I put together an upgraded home server. In all honesty, I’ve been loving it. Not only has the hardware & disk layout worked really, but deploying all my applications as containers has made everything just work and I haven’t had to put my hands on the system once. Everything is self updating. ….until something inevitably breaks, but I’ll worry about that later. ;)
My goal from the beginning was to deploy this using bootc, but due to some time pressure at work that wasn’t possible. I finally made some time and successfully moved the system over to fedora-bootc, and I’m going to share my experience for others considering doing the same. Keep in mind that I don’t expect details of this post to age very well as the tech is moving pretty fast.
In general, it’s considered a best practice when running containers to ensure that the images are being rebuilt on a regular basis to pickup security/bug fixes. In a real production environment, it’s common to use something like jenkins, github actions, or some type of automation or CI/CD workflow to keep the images fresh. ….but here at my house, I only have a single server that runs containers and my use case doesn’t really warrant a more serious CI/CD setup. This blog will show you how to setup a simple “perpetual motion” machine to automatically rebuild container images and then auto-update them. It’s also pretty easy to setup and works great too!
This is the “after” ….I always forget to take the before shot!
I’ve been running a little home server for probably close to twenty years. Originally, it was driven by my desire to learn Linux and run a whole-home MythTV setup. I still think that was an amazing setup for the time, but of course things change and broadcast TV just isn’t what it used to be. About five years ago, I decommissioned my server and moved my media library to a Helios4 by Kobol. My media frontends are now mainly built into our TVs, Fire TVs, or phones/tablets. The NAS was definitely a cool unit and helped my electric bill some, but ultimately the performance left a lot to be desired. ….using it for ostree commits the past few years was painful.
A few days ago an electrical storm took out my trusty APU 1d. At first I thought that it was only the power supply that died, but the WAN NIC is not recognized ~80% of the time. I thought I could simply just use the OPT1 port instead, but no. Randomly the WAN port will reappear and wreak havoc with the system and basically stop all traffic on my network until it would again randomly disappear. It was an amazing piece of equipment, as was my trusty Alix 2d3 before it. ….even though I love these systems, it’s time to move on.
I wanted to try OPNSence instead of pfSense for this install. The only real hiccup I ran into moving over was around DHCP support for HTTP Boot. The pfSense team added a UI option for this not too long ago and it’s been super helpful for some of the Red Hat related provisioning testing I’ve put together. Anyway, my RFE was justifiably declined due to the deprecation of ISC dhcpd. No worries because it was pointed out that it’s super simple to add dhcp configuration drop-ins manually.
Adding dhcpd config outside of the UI
The project documentation does a great job of outlining how to do this. Basically just SSH to the system, create a file under: /usr/local/etc/dhcpd.opnsense.d/ and paste in the following w/ the correct IP & path for your environment:
class "httpclients" {
option vendor-class-identifier "HTTPClient";
match if substring (option vendor-class-identifier, 0, 10) = "HTTPClient";
filename "http://[webserverip]/path-to-efi-nbp";
}
That’s it! Once this file has been written, just reload/restart the DHCP server and the config will take effect. If you’re using a RHEL or Red Hat derived distro you’ll want to load the shim for grub as the NBP (network boot program). This is typically /EFI/BOOT/BOOTX64.EFI on the boot media. If you want to move out of the stone ages w/ PXE/TFTP, HTTP booting straight from the firmware is awesome. Basically, just copy the boot media to a web server, modify the grub menu as needed (you’ll likely need to adjust the kernel & initrd paths to align w/ your web server path), and finally pass the desired NBP. If you’re coming from the PXE world, there’s a good chance you’re using pxelinux.0 or some flavor of ipxe, that will get replaced with grub. Easy peasy!
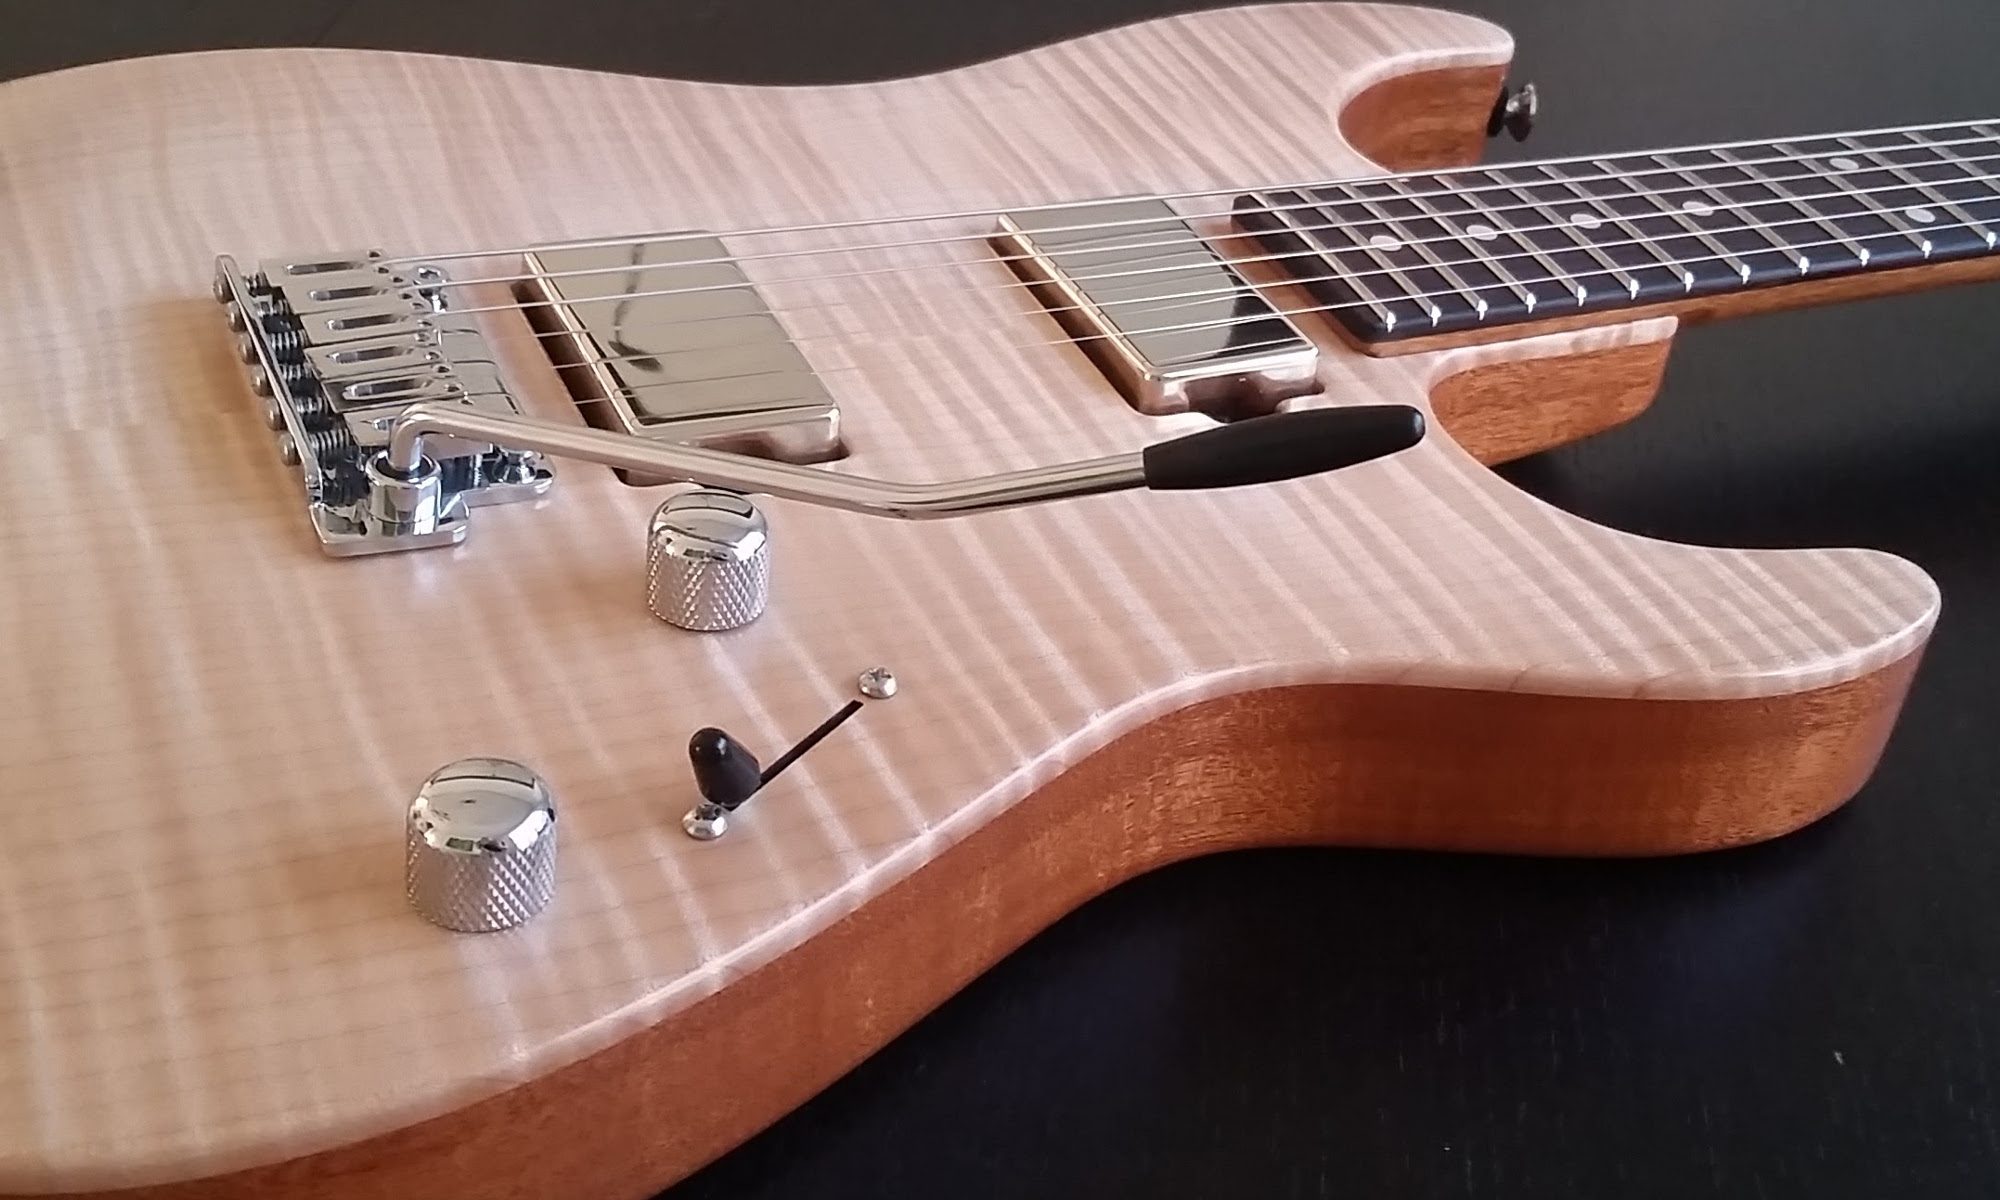
I wrote a fairly in-depth review for this guitar on Sweet Water and it ended up getting butchered after I submitted an update. So I thought maybe I should stop slacking on my blog and write this up properly. So sit back, grab your favorite beverage of choice and read on!
Raised garden beds are fantastic because they drain well, are relatively easy to build, and are capable of producing an impressive yield of food. Amanda and I have built a couple of these based on the Pioneer Woman’s blog post on this subject. These worked really well for us, but we wanted to step up our garden and needed to solve two problems: 1) more space 2) protect against rabbits and our crazy dog. Other geographies will need different adaptations to protect against different pesky critters, for example burrowing animals. The design shown here should lend itself fairly well to various types of adaptations. If you come up with something neat please share it with us!
About a year ago I started working with HTTP boot. It’s great that we no longer need a TFTP server for network booting, but there are also a few less than ideal challenges with the newer method. The biggest one is lack of documentation and simple configuration with DHCP servers. There are some examples available for the isc-dhcp-server used in many Linux/Unix systems, but if you’re using something like Ubiquiti or pfSense, good luck! It’s been a while since I’ve looked at an enterprise IPAM setup, but I fully expect support to be lacking there as well.
I opened a bug on this issue and was really impressed with how quickly the team jumped on it. Now if you’re running the 2.6.0 release, which is the latest as I write this, it’s pretty simple to get this up and running. Basically they added a field for UEFI HTTPBoot. It sounds simple enough right?
But adding it wasn’t working on either of my systems. I did a little packet sniffing and compared the response I was getting from my pfSense system vs a working dhcpd config in RHEL. In short, pfSense wasn’t sending option vendor-class-identifier “HTTPClient” with the response so my systems weren’t responding to the URL. Luckily it’s super simple to add this in the UI. Basically just add an additional option w/ the number 60, Type Text, and HTTPClient in the Value section. As seen here:
And that’s pretty much it. My network now offers up both PXE and HTTP boot to clients and it works really well. Hopefully this will help someone until this option is provided by default when the “UEFI HTTPBoot URL” is used.
Now all that’s left is to come up with a menu system that’s as powerful as syslinux that works with HTTP Boot. To date, I’ve only used GRUB and ……it really makes me miss the menu system from syslinux. It’s superior in every way IMO.
Recovering your Barwa chair is totally possible and we’ll help you do it!
Barwa chairs are amazing. It’s a mid-century modern chair that features two sitting positions; both are incredibly relaxing and comfortable IMO. The design is incredibly smart yet simple and elegant in the execution. The chair pictured here belonged to my father’s family and is approximately 70 years old. In April of 2021, Amanda and I restored it and documented a fair amount of the work here on youtube. Covers are incredibly difficult to come by, but the good news is you can make your own! Start by watching the videos and I’ll detail as much of the process as possible here. Also, please leave comments with your tips, suggestions, etc. I’ll keep this page updated based on feedback, and hope that it becomes a valuable resource to help others maintain these wonderful chairs.
I’ve been a big proponent of network based provisioning pretty much my entire career. My second job out of college involved imaging ~800 computers multiple times a week. When I was hired, my predecessors used floppy disks to load a small OS, matching NIC driver, and imaging client (remember Ghost?!). The bottom line was it was very time/labor intensive and a horrible process. Imaging a group of systems took about 30-60 min. Long story short we reduced that time to about 5 min after we leveraged a combination of PXE, wake-on-lan, UNDI drivers, vlans, and IGMP snooping. My second iteration of the solution took the total attended time to less than 30 seconds. Anyway, it’s amazing technology for provisioning, and I even got hired at Red Hat by giving a presentation on PXE. Needless to say, I’m a huge fan!
I’m going to share my thoughts and opinions for how I get the most value with a Warmoth parts guitar. This isn’t necessarily a how to save money post, although I’ll inlcude some thoughts along those lines as well. I’ve been really happy with my Warmoth builds and it’s my hope that some of you will find my thoughts helpful. Enjoy!
While waiting for the pickguard to arrive from Canada I decided to knock out some detail work. Shielding can be a controversial topic, but I recommend doing it and I much prefer using copper foil over some of the conductive paint products I’ve tried in the past. This is the cleanest job I’ve ever done. Tracing and cutting out pieces the exact size of the pickup routes worked really well. During my last build I also learned that it’s not a good idea to shield the route for the input jack. Skipping that also sped up the process.
I’m a huge fan of the legacy of a company from the 90’s called Stephen’s Stringed Instruments. Stephen Davies and team created some really unique guitars and they are becoming increasingly difficult to come across these days. The old website is still up and I love reading the specs page. I really like his comments around finishes and this meshes well with my experiences.
While I very much enjoyed my first Warmoth tele, it was my first attempt at putting a partscaster together. Compared to some of my other guitars, it wasn’t holding up any more. I played the hell out of that guitar and felt pretty comfortable giving the neck & body away. I wanted a similar Nashville tele, but with a similar finish to the last one I built. I was so happy with the N4-ish Warmoth I put together, I wanted to see if I could recreate some of the magic with that guitar on a new one. I decided to hang on to the hardware and pick up a different neck & body.